carpentry

carpentry

Monday, 20 June 2011

BBQ TABLE

  • Material list
  • 95x45,75x45 Treatment h3.2, nails 90x3.8 Galv ,Engineering Bolts 110x12mm washers

  1. Measure and cut and plane 95x45
  2. measure and cut table top 1600 mm and seat bearings
  3. nail 95x45 to table top bearers with 150mm over hang
  4. cut table legs which are cut at a 30 degree angle and are 900mm long
  5. nail legs to seat bearers only when legs are squared off the top
  6. nail top of the legs to table top bearers
  7. square up legs with roofing square
  8. trace and cutt and nail braces from seat bearers to centre of the table top
  9. nail seat slats off
  10. finish off with drill and screw bolts where legs and bearers meet


Monday, 30 May 2011

11/MAY/2011

On Wednesday we worked on the soffit. Me and Cory went up on the scaffolds. marking out how long the gap was so we could fit the soffit in, and witch parts to cut on the soffit, we also had to mark out on to the soffit, were the rafters lined up and so we know were we are going to nail the soffit. after we did that we started doing our vermin proof. I had to make sure that the vermin proof had a 10mm over hang on the outside of the bottom. then after i did that me, Linoel, Corey and Sam worked on the back of our house. doing the back wall (colour steel cladding). 1st we measured how far apart we were going to drill the wholes. we put all the tiles on top of each tile so we can predrilled the holes. we used a battery drill. then after we drilled the hole we put them up on the back wall one by one and used a air drill to drill the tiles up onto the back wall. we finished all this before lunch time.

Thursday, 5 May 2011

RESEARCH TOPIC.

Bracing Tytpes of bracings to use:
  • Long span trusses are braced securely at the end of the building. Shorter trusses can be
    supported laterally by a single gable end brace. The ground braces should be located directly in
    line with all rows of top chord continuous lateral bracing, otherwise the top chord of the first truss
    can bend sideways and allow the trusses to shift, putting a substantial strain on all connections
    of the bracing system. Scabs should not be nailed to the end of the building to brace the first
    truss. These scabs can break off or pull out, thus allowing a total collapse.

    Cross-bracing subsequent trusses to prevent buckling
    As trusses are continuously set in place, sufficient temporary bracing is applied to hold the trusses plumb, in alignment and secure untill permanent bracing, decking and/or sheathing can be installed. Temporary bracing should not be less than 38 × 89 mm lumber and should be as long as possible. The use of short spacer pieces of lumber between adjacent trusses is not considered a means of bracing. Temporary bracing should be nailed with two 3-1/2" double headed nails at every intersection with the braced members. The practice of removing bracing to adjust spacing of trusses as sheathing is applied can cause trusses to topple if a key connection is removed at the wrong time. Therefore, exact spacing of trusses should be maintained as temporary bracing is applied. Cross bracing should be installed as soon as the first few trusses are in place, in the vertical plane, between trusses, together with continuous lateral braces fastened to the top and bottom chords to prevent the trusses from toppling.

     Temporary bracing of top-chord plane
    Truss top chords are very susceptible to lateral buckling before they are braced or sheathed.
    Continuous lateral bracing should be installed within 150 mm of the ridge line or centre line and at
    approximately 2.4 to 3 m intervals between the ridge line of sloped trusses or centre line of flat
    trusses and the eaves. Diagonals, set at 45° between the lateral bracing, form the required
    stability of the top chord. On longer span trusses, lateral bracing and diagonals may require
    closer spacing. If possible the continuous lateral bracing should be located on the underside of
    the top chord so that it does not have to be removed as sheathing is applied. This will ensure that
    the trusses are held securely during installation of the decking. Bracing lumber should be no less
    than 38 × 89 mm by 3.05 m long.

    Temporary bracing of web member plane
    Temporary bracing of the web member plane is usually installed at the same location specified on
    the engineering plan for permanent bracing. Permanent lateral web bracing should be called out
    on the truss design to reduce the buckling length of the individual web members. The bracing can
    form part of the temporary and permanent web bracing system. Sets of diagonal bracing should
    not be spaced more than 6 m apart (clear space between end of one set of braces and start of
    another set).

     Temporary bracing of bottom chord plane
    To hold the proper spacing of the bottom chord, continuous lateral bracing at no greater than 2.4
    to 3 m on centre along truss length is used for the full length of the building, secured to the
    bottom chord. Diagonal bracing at 45° between laterals will stabilize this bracing system. The
    bracing is usually left in place to become part of the permanent bracing system. Once the
    temporary bracing is properly installed, permanent bracing and decking can be installed.
    Concentrated loads from sheathing or roofing material should not be placed on trusses. These
    loads should be spread evenly over a large area to prevent overloading of any one truss. A limit of
    eight sheets of plywood should be placed on any pair of trusses and should be located adjacent
    to the supports.

     Permanent bracing of top chord plane (large buildings)
    If plywood floor or roof sheathing is properly applied with staggered joints and adequate nailing,
    a continuous diaphragm action is developed to resist lateral movement at the top chord, and
    additional bracing in the plane is generally not required. Some metal roofing materials may act as
    a diaphragm when properly lapped and nailed, but selection and use of these materials is at the
    discretion of the building designer. If purlins are used, spaced not to exceed the buckling length at
    the top chord, diagonal bracing should be applied to the underside of the top chord to prevent
    lateral shifting of the purlins. The diagonal bracing should be installed on both sides of the ridge
    line in all end bays. If the building exceeds 18 m in length, this bracing should be repeated at
    intervals not exceeding 6 m.

     Permanent lateral bracing to web member or bottom chord plane (all buildings)

    Permanent bracing in web and bottom chord planes is usually applied as temporary bracing
    (Steps 4 and 5). Lateral bracing of compression web members is a typical method to prevent
    buckling. The method used to anchor the lateral bracing must be specified by the designer.
    Bottom chord bracing helps to maintain truss spacing, also can resist buckling caused by stress
    reversal. Multiple-bearing or cantilevered trusses can result in compressive forces in bottom
    chords.

RESEARCH TOPIC

TYPES OF FIXING'S

Nails, Screws, and Bolts


Most repair projects require such fasteners as nails, screws, glues, and bolts. And there are many of each type to choose from! The following are some of the most common types of fasteners and advice on how to select the right one for your fix.Nails

The easiest way to fasten two pieces of wood together is with nails. They are manufactured in a variety of shapes, sizes, and metals to complete almost any fastening job. Most commonly, nails are made of steel, but other types -- aluminum, brass, nickel, bronze, copper, and stainless steel -- are available for use where corrosion could occur. In addition, nails are manufactured with coatings -- galvanized, blued, or cemented -- to prevent rusting and to increase their holding power.


Nail size is designated by penny size, originally the price per hundred nails. Penny size, almost always referred to as "d," ranges from 2 penny, or 2d (1 inch long), to 60 penny, or 60d (6 inches long). Nails shorter than 1 inch are called brads; nails longer than 6 inches are called spikes. The length of the nail is important, because at least two-thirds of the nail should be driven into the base, or thicker, material. For example, a 1X3 nailed to a 4X4 beam should be fastened with an 8 penny, or 8d, nail. An 8d nail is 21/2 inches long; 3/4 inch of its length will go through the 1X3, and the remaining 13/4 inches will go into the beam.

Nails are usually sold by the pound; the smaller the nail, the more nails to the pound. You can buy bulk nails out of a nail keg; the nails are weighed and then priced by the retailer. Or you can buy packaged nails, sold in boxes ranging from 1 pound to 50 pounds. For most repairs, a few 1-pound boxes of popular nail sizes will last a long time. What follows are some of the most common nail types.

Common Nails: Used for most medium to heavy construction work, this type of nail has a thick head and can be driven into tough materials. Common nails are made from wire and cut to the proper length and are available in sizes 2d through 60d.

Box Nails: Lighter and smaller in diameter than common nails, box nails are designed for light construction and household use.

Finishing Nails: Finishing nails are lighter than common nails and have a small head. They are often used for installing paneling and trim where you do not want the nail head to show.

Roofing Nails: Usually galvanized, roofing nails have a much larger head than common nails. This helps to prevent damage to asphalt shingles.

Drywall Nails: Nails made for drywall installation are often ringed and have an indented head. Annular-ring nails have sharp ridges all along the nail shaft, providing greater holding power.

Masonry Nails: There are three types of masonry nails designed for use with concrete and concrete block: round, square, and fluted. Masonry nails should not be used where high strength is required. Fastening to brick, stone, or reinforced concrete should be made with screws or lag bolts.

Tacks: Available in both round and cut forms, tacks are used to hold carpet or fabric to wood. Upholstery tacks have decorative heads.

Corrugated Fasteners: Corrugated fasteners, also called wiggly nails, are used for light-duty joints where strength is not important. The fasteners are set at right angles to the joint.
Screws provide more strength and holding power than nails. Additionally, if something needs to be disassembled, screws can easily be removed. Like nails, screws are available with different coatings to deter rust. They are manufactured with four basic heads and different kinds of slots. Flathead screws are almost always countersunk into the material being fastened so the head of the screw is flush with (or lower than) the surface. Oval-head screws are partially countersunk, with about half the screw head above the surface. Roundhead screws are not countersunk; the entire screw head lies above the surface. Fillister-head screws are raised above the surface on a flat base to keep the screwdriver from damaging the surface as the screw is tightened.

Most screws have slot heads and are driven with slotted, or standard, screwdrivers. Phillips-head screws have crossed slots and are driven with Phillips screwdrivers. Screws are measured in both length and diameter at the shank, which is designated by gauge number from 0 to 24. Length is measured in inches. The length of a screw is important because at least half the length of the screw should extend into the base material. Tip: To prevent screws from splitting the material, pilot holes must be made with a drill before the screws are driven.

For most home repair purposes, wood screws will suffice. Sheet metal screws, machine screws, and lag screws also come in various types. If you're trying to replace one of these screws, take an old screw with you to the hardware store.


Wood ScrewsWood screws are usually made of steel, although brass, nickel, bronze, and copper screws should be used if there is potential for corrosion.

Sheet Metal ScrewsUse this type of screw to fasten pieces of metal together. Sheet metal screws form threads in the metal as they are installed. There are several different types of sheet metal screws. Pointed panhead screws are coarse-threaded; they are available in gauges from 4 to 14 and lengths from 1/4 inch to 2 inches. Pointed panheads are used in light sheet metal. Blunt panhead screws are used for heavier sheet metal; they are available in gauges from 4 to 14 and lengths from 1/4 inch to 2 inches. Both types of panhead screws are available with either plain or Phillips-head slots.

Roundhead ScrewsPartial-tapping roundhead screws have finer threads; they can be used in soft or hard metals. They are available in diameters from 3⁄16 inch to 11/4 inches. Self-tapping roundhead screws are used for heavy-duty work with thick sheet metal and are available in diameters from 1/4 inch to 2 inches and in lengths from 1/8 to 3/4 inch. Both types of roundhead screws are available with either plain or Phillips-head slots.

Machine ScrewsMachine screws are blunt-ended screws used to fasten metal parts together. They are commonly made of steel or brass. Like other fasteners, they are also made with coatings -- brass, copper, nickel, zinc, cadmium, and galvanized -- that help deter rust. Machine screws are manufactured with each of the four basic types of heads -- flathead, ovalhead, roundhead, and fillister-head -- and with both plain and Phillips-head slots. They are typically available in gauges 2 to 12 and diameters from 1/4 inch to 1/2 inch and in lengths from 1/4 inch to 3 inches.

Lag ScrewsFor light work, lead, plastic, or fiber plugs (called anchors) can be used to hold screws. But for larger jobs and more holding power, lead expansion anchors and lag screws are used. Lag screws are heavy-duty fasteners. They are driven with a wrench and are used primarily for fastening to masonry or wood framing. The anchors are inserted into holes drilled in the masonry, and the lag screws are driven firmly into the anchors.

BoltsBolts are used with nuts and often with washers. The three basic types are carriage bolts, stove bolts, and machine bolts. Other types include the masonry bolt and anchor, toggle bolt, and expansion bolt, which are used to distribute weight when fastening something to a hollow wall. Machine bolts are manufactured in two gauges: fine-threaded and coarse. Carriage and stove bolts are coarse-threaded. Bolt size is measured by shank diameter and by threads per inch, expressed as diameter by threads (for example, 1/4X20). Carriage bolts are available up to 10 inches long, stove bolts up to 6 inches, and machine bolts up to 30 inches. Larger sizes usually must be special ordered.

Carriage Bolts

Carriage bolts are used mainly in making furniture. They have a round head with a square collar and are tightened into place with a nut and wrench. The collar fits into a prebored hole or twists into the wood, preventing the bolt from turning as the nut is tightened. Carriage bolts are coarse-threaded and are available in diameters from 3⁄16 to 3/4 inch and lengths from 1/2 inch to 10 inches.

Stove BoltsStove bolts aren't just for stoves; they are quite versatile and can be used for almost any fastening job. They are available in a wide range of sizes, have a slotted head -- flat, oval, or round, like screws -- and are driven with a screwdriver or tightened into place with a nut and wrench. Most stove bolts are completely threaded, but the larger ones may have a smooth shank near the bolt head. Stove bolts are coarse-threaded and are available in diameters from 5⁄32 to 1/2 inch and lengths from 3/8 inch to 6 inches.

Machine BoltsMachine bolts have either a square head or a hexagonal head. They are fastened with square nuts or hex nuts and are wrench-driven. Machine bolts are manufactured in very large sizes; the bolt diameter increases with length. They are either coarse-threaded or fine-threaded and are available in diameters from 1/4 inch to 2 inches and lengths from 1/4 inch to 30 inches.

Masonry Bolts and Anchors

These work on the same principle as the lag bolt or screw; a plastic sleeve expands inside a predrilled hole as the bolt is tightened.

Hollow Wall Bolts

Toggle bolts and expansion bolts are used for fastening lightweight objects, such as picture frames, to hollow walls. Toggle bolt wings are opened inside the wall by a spring. Expansion bolts are inserted into an expansion jacket, which expands as the bolt is tightened. The bolts are available in diameters from 1/8 to 1/2 inch and lengths up to 8 inches for walls as thick as 13/4 inches


ROOF CLADDING'S

Single skin profiled metal sheet. Wall and Roof Cladding
Single Skin Roof Sheeting and Wall Sheeting is obviously the most economic way of covering steel framed storage warehouses.


Double skin insulated sheet. Wall and Roof Cladding
Double skin insulated roof sheeting or wall sheeting or both will reduce condensation and reduce temperature change in a storage warehouse. Insulation is essential if the storage space is to be heated or cooled. A double skin roof will reduce the chances of leaks. The fibreglass insulation compacts well for sea freight. If insulation of storage warehouses is required then the double skin system is possibly the most cost effective solution. U value can vary from 0.45 W/°C/m² to 0.20 W/°C/m².


Composite Sandwich. Roof and Microrib Wall Cladding
Composite Double Skin Sandwich Boards can be used for roofing steel framed storage warehouses. A nearly flat mini rib composite sandwich panel can be used on walls. It can be self finish inside and out and can have windows and doors fitted for a smart look. It is often used around main entrances and offices where the rest of the storage shed is clad with type 2.

Roof cladding is a protective layer, like skin, that shields a building's interior and structure from exterior weather and climate. Although the exterior cladding, such as siding, protects a building's walls, roof cladding must be able to effectively deter moisture, winds, temperature and sun from harming a structure. Most often, a roof is clad with shingles or rolled roofing, however other systems protect a roof structure, such as metal panels and rubber roofing.

  1. Moisture

    • A structure's interior must be protected from rain and snow. Roof cladding is waterproof and denies moisture from absorbing into the structural sheathing. Asphalt shingles and rolled roofing accomplish this by overlapping, like a fish's scales. Rubber roofing and standing seam metal roofs do this by creating a continuous waterproof sheet across the whole of the roof plane.

    Winds

    • Roof cladding must protect from and resist damage by winds. Areas prone to hurricanes and tornadoes have building codes that require roofs be well fastened to the building's structure. Flat roofed buildings with rubber roofing use a ballast of aggregate to protect the roof from uplift from heavy winds.

    Temperature

    • The roof cladding must be able to insulate a building's interior from the exterior temperature. Most often, this is accomplished with rigid foam insulation. However, other methods, including building up multiple plies of roofing and shingles with high thermal mass, such as terra cotta or slate, can insulate a structure from the roof.

    Sun

    • The roof is very exposed to the sun and the ultraviolet waves that emanate from it. Roof cladding must be resistant to sun damage. So, roofing is often not composed of plastics or wood. Instead, durable materials are used to produce roof cladding. Asphalt, slate and steel are excellent against the sun's rays. The ballast on rubber roofs acts as a sun block, protecting the roof from the degrading solar radiation.

    Future Roof Cladding

    • Although many man-made materials are not appropriate for use as roof cladding, advances are being made with vinyl and other materials to allow them to be used as roofing. In fact, some roofing composed of man-made materials, such as fiberglass, are already being sold. As technology improves materials and methods of creating roof cladding, we may see other new materials, like ceramic, or we may find roofing is applied in broader sheets, covering more surface area with less labor.

Research Topic

The 4Ds of weathertightness

The 4Ds as used in E2/AS1 are:
  • Deflection – keeping water away from potential entry points.
  • Drainage – providing means of removing water that does enter.
  • Drying – allowing any remaining moisture to be removed by ventilation or diffusion.
  • Durability – providing materials with appropriate durability

  • Deflection: The art of protecting joints
    Keeping water away from entry points will greatly reduce the chance of a joint developing a leak.   The first means of deflection is roof designs, verandahs and overhangs which protect wall surfaces. Other forms of deflection are found in facings, flashings and overhangs which also contribute to reducing water entry.

  • Drainage: Allowing unwelcome water to escape
    It is important to allow for water which has entered to drain away. Direct fixed claddings will provide limited drainage if water does get behind and can hold water against underlay, thus it is very unlikely water will be able to drain away. In constructing a drainage cavity behind the cladding, allows the passage of water on the back of the cladding to drain away.

  • Drying: Evaporate the rest
    For water that has entered, but has not drained away it must be allowed to dry through diffusion and ventilation ie Brick Veneer, EIFS systems with cavity ventilation holes in bottom tray.

  • Durability:  Make it last
    To prevent leaks and to make the building envelope last it is crucial that durable products are used. Leaks have contributed to untreated timber rotting in under two years from lack of water being able to drain away which in turn leads to the establishment of fungi growth which caused not only health issues but spread the rot beyond the original area . The use of timber treatment will markedly slow the establishment of rot and isolate the damage.
    Not only should timber be durable, but also fixings, finishes along with all materials.

  • The combination of these 4D’s will ensure that future buildings will be more robust than those which are now experiencing weathertight issues.


RESEARCH TOPIC

INSULATION


Types of Insulation
There are four basic types of insulation: loose fill, batts and blankets, rigid board and spray foam. The most appropriate type of insulation to use will vary based on the type of construction, the extent of the rehabilitation planned and applicable code requirements.
Loose-fill Insulation
Loose-fill insulation includes loose fibers or fiber pellets that are blown into building cavities or attics using special equipment. It generally costs more than batt insulation. However, it usually fills nooks and crannies easier, reduces air leakage better, and provides better sound insulation than natt-type insulation.
Cellulose fiber,
 made from recycled newspapers, is chemically treated for fire and moisture resistance. (Check that the bags are clearly labeled to indicate that the material meets federal specifications for fire resistance). It can be installed in walls, floors or attics using a dry-pack process or a moist-spray technique.
Fiberglass and rock wool loose-fill insulation provide full coverage with a "Blow-in Blanket" System (BIBS) that involves blowing insulation into open stud cavities behind a net.
Loose-fill insulation typically has a value of approximately R-3 to R-4 per inch. Cellulose fiber has approximately 30% more insulating value than loose-fill rock wool for the same number of inches installed.
Batt and Blanket Insulation
Batt and blanket insulation is made of mineral fiber -- either processed fiberglass or rock wool -- and is used to insulate below floors, above ceilings, and within walls. Generally, batt insulation is the least expensive wall insulation material but requires careful installation for effective performance.
This type of insulation is best suited to a standard joist, rafter, or stud spacing of 16 or 24 inches. Batts and blankets come in widths to fit securely between the wood-framing members. Some come with a radiant barrier backing. Batts generally come in lengths of 4 or 8 feet. Blankets come in long rolls that are cut to the desired length for installation. Both batts and blankets typically have an R-value of approximately R-3 per inch of thickness.
Rigid Board Insulation
Rigid board insulation is commonly made from fiberglass, polystyrene, or polyurethane and comes in a variety of thicknesses with a high insulating value (approximately R-4 to R-8 per inch). This type of insulation is used for reproofing work on flat roofs, on basement walls and as perimeter insulation at concrete slab edges, and in cathedral ceilings.
For interior applications it must be covered with 1/2-inch gypsum board or other building-code approved material for fire safety. For exterior applications it must be covered with weather-proof facing. Check the applicable codes to determine local requirements for covering rigid board insulation to achieve fire resistance.
Spray Foam Insulation
Spray foam insulation is a two-part liquid containing a polymer (such as polyurethane or modified urethane) and a foaming agent. The liquid is sprayed through a nozzle into wall, ceiling, and floor cavities. As it is applied it expands into a solid cellular plastic with millions of tiny air-filled cells that fill every nook and cranny. Spray foam insulation should be applied by a professional using special equipment to meter, mix, and spray into place. Spray foam insulation is commonly used for retrofits; it is good for irregularly shaped areas and around obstructions
Spray foam materials cost more than traditional batt insulation. However, since spray foam forms both an insulation and an air barrier, it can be cost competitive with batt insulation because it eliminates the steps for air-tightness detailing (such as caulking, applying housewrap and vapor barrier, and taping joints).


RESEARCH TOPIC

FRAMING
ROOF MEMBERS:


Monday, 2 May 2011

02/05/2011 SCAFFOLDING

Today we worked on setting out scaffolds and learning the parts of the scaffolds. And also learning different kinds of scaffolding and also witch types of scaffolds are used in different ways. i learnt that Scaffolds are used as platforms and also a great way to keep your construction site safe and also  With scaffolding, construction workers have a reliable way to keep firm footing when working on hard to reach areas. Scaffolding is also a great way to keep supplies handy. You can place your supplies on a scaffolding plank and, instead of walking up and down a ladder to get more supplies, your supplies will be right on the scaffolding plank with you. Using scaffolding will make anyone feel more secure when working on projects that require any kind of climbing. it gives you more room to move and for me personally i feel safer and more steady because the platform is more wider and their is not that much movement.


But then it started raining and we had to go inside to wait it out.
but it kept on raining and so we started on our tool boxes.we used 15mm 'ply' 5mm. we started on both ends of our toool boxes and also the bottom. 1st we laminted both of our 510mm 'ply' wood and made sure they were both square.. then measured 35mm to centre and then 10mm each side of the centre and marked it with a carpenters pencil. then from the centre of the 35mm we measured in 56mm centre on both ends and once i did that i measured 10mm each side of the centre and then measured 15mm down from each cut and marked it with an "X" so i know witch part is the off cutt and then i started cutting with the hand saw. i made one mistake. i cut on my pencil lines. i learnt that i always had to cut on the waiste side of the line. so yeah i learnt from my mistake and next time i'll make sure i'll cut on the waiste side.
Scaffolding Transom

A horizontal member supported on standards, on which the scaffold planks are laid. Also used as safety rails to end bays.

Ledger

A horizontal member supported on standards, on which the transoms are laid in tube and coupler work. In modular systems they perform the function of stiffening the standards and maintaining the correct bay widths. Also they are used as hand rail and guard rail supports.

Standard

A long vertical tube or a shorter tube with welded fitments in modular systems. The main load bearing members.

Scaffold Brace

Sloping angled tubes that provides sideways and length ways bracing.

Safety Mesh

Various forms of mesh, steel or fabric that is designed to stop tools or materials falling off the platforms

                                              SCAFFOLDS AND SCAFFOOLDING

Scaffolding is an extremely important piece of construction equipment. Scaffolds are a great way to keep the construction site safe. With scaffolding, construction workers have a reliable way to keep firm footing when working on hard to reach areas. Scaffolding is also a great way to keep supplies handy. You can place your supplies on a scaffolding plank and, instead of walking up and down a ladder to get more supplies, your supplies will be right on the scaffolding plank with you. Using scaffolding will make anyone feel more secure when working on projects that require any kind of climbing.

Scaffolding

Scaffolding is the general term used for all the products that make up a scaffold. Scaffolds are usually made from steel or aluminum. Scaffolding can be used for many purposes and can be of many sizes. Most of the larger scaffolding are anchored or tied to the building for additional support. Some of the main components of a scaffolding are:

Scaffolding Standards

Scaffolding Standards are also known as uprights. Scaffolding standards are vertical tubes that are the main support for the scaffolding. Standards transfer the scaffolding load to base plates or base boards which spread the load of the scaffold.

Scaffolding Ledgers

Scaffolding ledgers are the horizontal tubes which connect to the scaffolding standards or uprights. Scaffolding ledgers are an important because they add stability to the scaffold. Scaffolding ledgers are also needed because the scaffolding transoms are placed on these which allow scaffolding planks to be used.

Scaffolding Transoms

Scaffolding Transoms are tubes that rest at right angles on the scaffolding ledgers. These are the support for the planks and boards of the scaffold. Without the scaffolding transoms, scaffolding boards wouldn't have much support and would not be able to carry much weight. By using scaffolding transoms properly, a scaffolding board can support a lot of weight.

Scaffolding Cross Brace

Scaffolding cross braces are used to support the scaffold and add rigidity. These are placed to support the scaffolding standards and scaffolding ledgers. Scaffolding cross braces are especially important for larger scaffolds and the extra stability they provide will increase construction safety.

Scaffolding Base Plate

Scaffolding base plates are used to hold and support the scaffolding standards. Scaffolding bases help spread and distribute the weight of the scaffolding. By using scaffolding bases, more load may be placed upon the scaffold standards because of the distribution of weight.

Scaffolding Planks

Scaffolding Planks and scaffolding boards provide a working surface for scaffold users. Scaffolding Planks are placed upon scaffolding transoms and are made from seasoned wood, timber, laminate, steel, or aluminum. Scaffolding Planks come in many sizes to accommodate the particular needs of the individuals working on the scaffold.

Scaffolding Ladders

Scaffolding ladders make it easy to transition between the levels of a scaffold. Scaffolding ladders also make it easier to carry construction equipment and other building materials to where they are needed.

SCAFFOLDING DIAGRAM

Thursday, 14 April 2011

pictures of us working hard

 This is me and the group trying to figure out how we could build and  construct our Back wall
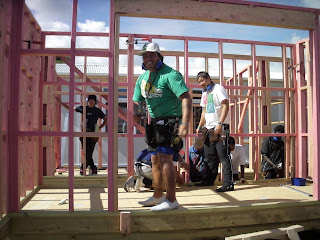
 ME AND MY GROUP POSING FOR OUR PHOTO'S
TEAM SUPREME BUILDERS.


 AROU CUTTING OUR PIECES OF TIMBER
 LIONEL DISCUSSING THE SIDE WALLS WITH MOE AND NIEL


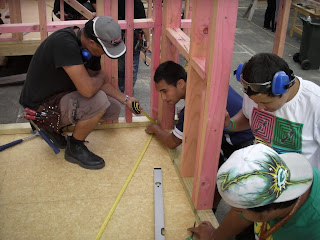
ME AND MY GROUP DOING A RUNNING MEASUREMENT SO WE CAN LAMINATE OUR LINTEL.


THIS IS OUR FOUR FRAMING'S UP AND FIXED TOGETHER
 ME AND THE BOYS NAILING OUR NOGS TOGETHER.


 We used our clamp just to hold our wall togetherso we could get them square.

This is the boys checking our studs and noggs are nailed in properly and that they are not loose.
This is my group setting up a stringline to check if our back wall is straight.


This is me working hard as ever.
This is me and my group trying to square up the corners of the house.


Now we are checking if our walls are square using the spirit level.